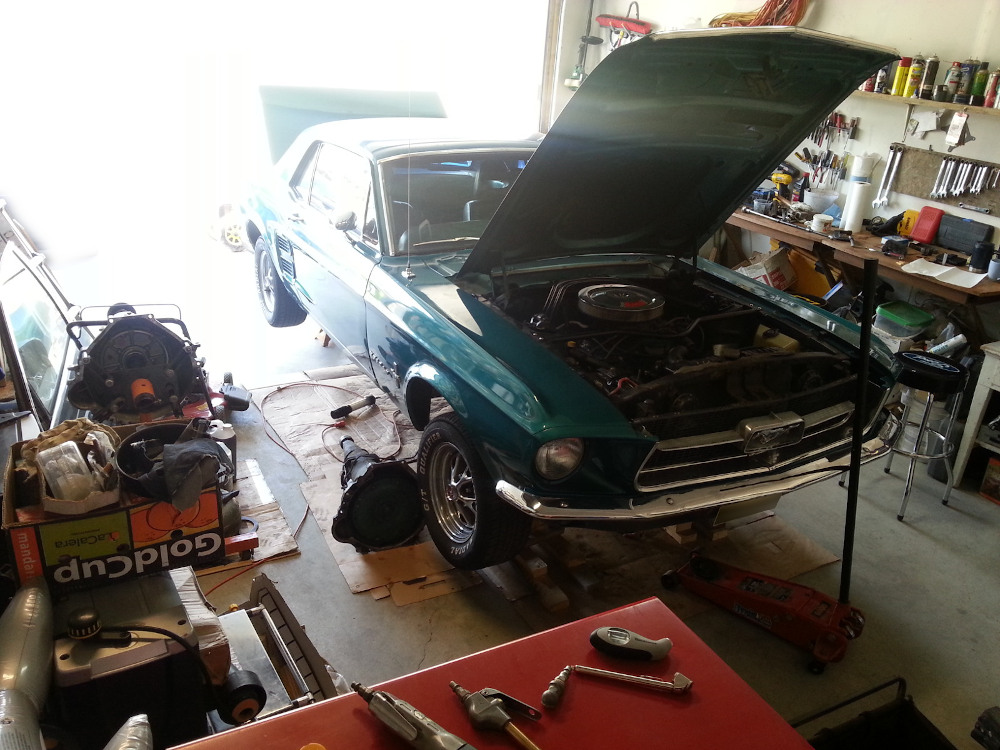
 67 Mustang Transmission Upgrade
67 mustang with a 4R70W
First, second, third, fourth and then the torque converter locks. Was that fifth gear? So good.
It was a challenge in some ways updating the 67 289 Mustang from a 3 speed auto to a 4 speed/over-drive auto with locking torque converter, but well worth the effort and by far one of the better upgrades.
Components
Looking around the net there were some people who swapped in an AOD, but afterwards found they were loaded with problems and way too temperamental. Especially easy to blow up!
After the early AOD design Ford progressed to a newer improved design called the 4R70W.
As years went on the 4R70W was tweaked and strengthened and by 1999 became quite a strong and dependable transmission. This warranted more research into what it would take to adapt it to work in the old Stang.
4R70W
The attractive thing about the 4R70W is it’s gear ratio’s.
Gear ratios
4R70W             C4
1ST = 2.84        1ST = 2.46
2ND = 1.55        2ND = 1.46
3RD = 1.00        3RD = 1.00
4TH = 0.70
REV = 2.32        REV = 2.18
The modern way of combining lower end power without sacrificing highway driving.
Likely the best candidates are:
Trucks
1999-2000 F-150 	4.2L 	XL3P-BA
2001-2003 F-150 	4.2L	1L3P-DA -EA
2004 F-150              4.2L 	4L3P-AA -BA (non-mechanical speedo)
(strongest - 99 & newer 4.2 V6 (easily good to 450 hp in stock form)

Next best candidates is:
1999-2000 Mustang 	3.8L	XR3P-AA
2001-2003 Mustang 	3.8L	1R3P-AA
(not quite as strong as the trucks - having one less clutch and friction plate minus a few hardened internals)

NOTE: Depending on shifter type/style the shifter arm may be pointing in wrong direction
      (up for trucks an T-birds, down for mustangs, etc.)
      Can be rotated - drop pan, remove roll pin, remove the nut, pull lever out from detent, rotate and reassemble.
Headed to the salvage yard.
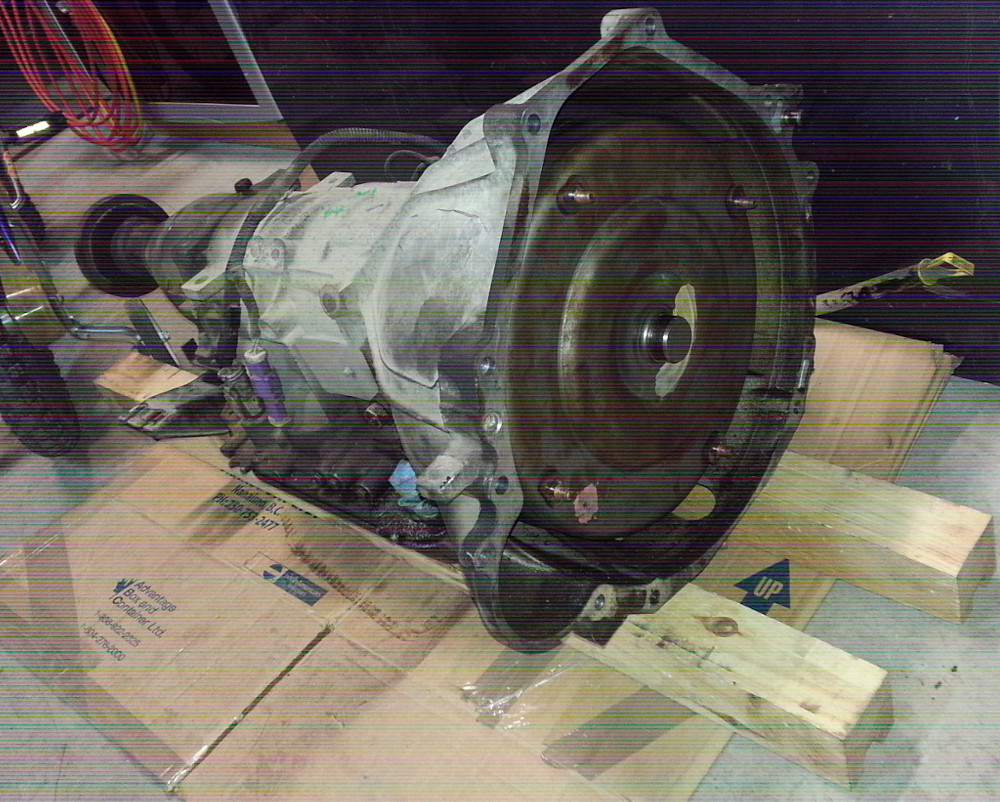
Found a 4R70W from a 2001 Ford Mustang (3.8 L) which, till 2003, still had the provision for the manual speedo gear.
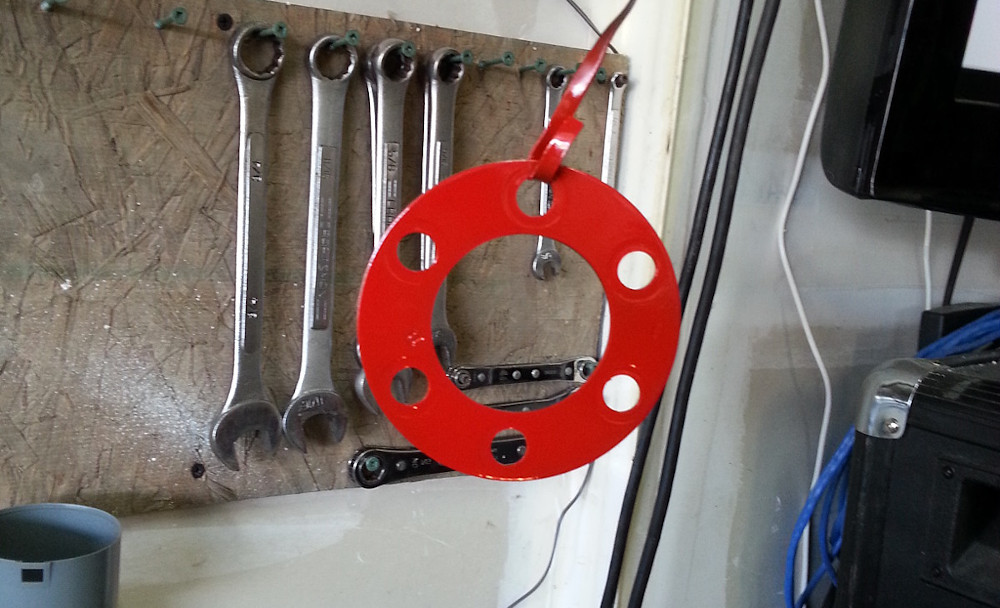
Flexplate
In order to make the 2001 locking torque converter adapt to the 289 yet line up with the slightly different starter position a specific style of flex plate and block gasket was needed. The original 289 C4 flexplate has 157 or 160 teeth with a 28oz imbalance compared to 164 teeth and 50 oz imbalance of the 4R70W. What was needed was one with the old small block bolt pattern, the same offset as the 4R70W with the 28oz imbalance and 164 tooth.
Likely candidates are:
TRUCKS & BRONCO (Full Size)	1969-80	302 engine & C5 or FMX transmission
TRUCKS & BRONCO (Full Size)	1981	351 W engine & C5 or AOD transmission
VAN ( Full size)		1968-73	302 engine & C5 or FMX transmission
VAN ( Full size)		1974	302 engine & C5 transmission
VAN ( Full size)		1981	351 W engine w/Cal ECS & C5 or AOD transmission
CAPRI   1979	302 engine, C5 & FMX transmissions
COMET	1977	302 engine & C5 transmission
COMET	1976	302 engine & C5 transmission
COMET	1969	351 engine & C5 or FMX transmission
FAIRLANE/FALCON 1971	Falcon w/351 engine, C5 & FMX transmissions
FAIRLANE/FALCON 1969-70	Fairlane w/351 engine, C5 & FMX transmissions
FAIRMONT 1978-79	302 engine
GRANADA 1976	302 engine & C5 transmission	EOAZ-6375A	F200
GRANADA 1975-77	351 engine & C5 transmission
GRANADA 1977-80	302 engine & C5 transmission
LTD     1979	351 engine & C6 transmission	D1ZZ-6375A	F205
LTD     1977-78	351 engine , C5 & FMX transmissions	EOAZ-6375A	F200
LTD     1969-74	351 engine, C5 & FMX transmissions	EOAZ-6375A	F200
LTD     1980-85	351 engine, C5 & FMX transmissions	EOAZ-6375A	F200
LTD     1979	351 engine, C5 & FMX transmissions
LTD     1968-72	302 engine, C5 & FMX transmissions	EOAZ-6375A	F200
LTD     1977-80	302 engine, C5 & FMX transmissions
LTD     1965-67	289 engine, C5 & FMX transmissions
LTD II  1977-79	302 engine, C5 & FMX transmissions	EOAZ-6375A	F200
LTD II  1977-78	351 W engine, C5 & FMX transmissions
MAVERICK 1976-77	302 engine & C5 transmission
MUSTANG 1972-73	351 engine w/2BC & FMX transmission
MUSTANG 1972	302 engine & FMX transmission	EOAZ-6375A	F200
MUSTANG 1969-70	351 engine, C5 & FMX transmissions	EOAZ-6375A	F200
MUSTANG 1971	351 engine w/2BC & C5 or FMX transmission
THUNDERBIRD   1977-80	302 engine, C5 & FMX transmissions
*THUNDERBIRD   1977-79	351 W engine, C5 & FMX transmissions
TORINO  1975-76	351 W engine, C5 & FMX transmissions	EOAZ-6375A	F200
TORINO  1969-70	351 engine, C5 & FMX transmissions	EOAZ-6375A	F200
TORINO  1971	351 engine w/2BC & C5 or FMX transmission
TORINO  1972-74	351 engine w/2BC & C5 or FMX transmission	EOAZ-6375A	F200
TORINO  1973	302 engine Police & Taxi & C5 or FMX transmission
BEWARE: Ford had a C6 164 tooth 28 oz flexplate which bolts up and everything, but has a minor difference in the offset. Without the right offset you would probably only get 30 miles before it blew up due to the extra pressure it would put on the pump after the bell housing got bolted up.
Flexplate C5AZ-6375-T (replaced by new part# E0AZ-6375-A ?)
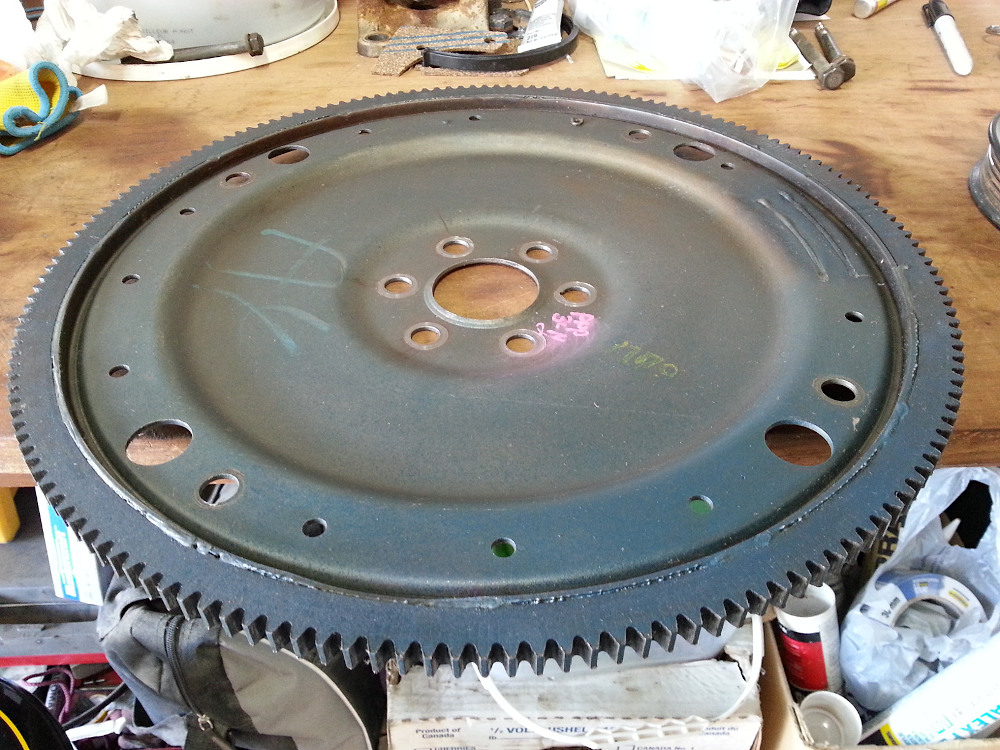
Went with a flexplate and block gasket out of a 78 Thunderbird with a 351 and a C5 transmission.
Driveshaft
The stock driveshaft would need to be shortened or replaced with a shorter one. You could use the original Mustang yoke by swapping the tailshaft off of an AOD transmission then shorten the original driveshaft by 2 inches. Another option would be to use a new or used 49 1/2 inch driveshaft in conjunction with a replacement yoke for the large diameter balancer on the stock 4R70W yoke.

Likely candidates are:
driveshaft 49.5 inch (narrow pipe)	-- 1986 Mercury Cougar
driveshaft yoke (no ring)(not a P71)	-- 1995 Ford Crown Victoria
new 1310/1330 offset u-joint
Went with those items.
The driveshaft from the 86 Cougar was just a 3 incher and likely just regular mild steel so it was important to calculate its critical speed (where it will turn into a skipping rope), which from this chart would be around 7000 rpm. So if you add a safety margin, let’s say 6500 rpm. Then calculate potential speed.
For example: 24.6 tire diameter, 3.73 gears, 1:1 ratio would be just over 120 miles an hour. When in overdrive at 0.7:1 the engine would be at 4550 rpm. Not something normally done anyway so should be safe enough.
Controller
One of the obvious things that was different about the 4R70W was the lack of a mechanical kick-down system. Instead Ford went with a bunch of solenoids and made it rely on computer control. This meant figuring out what controller to use or come up with.
Here are some options that were considered:
 Controller Research
 - aftermarket #1 (computer) (Most common) http://www.usshift.com/usq4.shtml
    - US Shift Controller ( aka Baumann Optishift ) to be used with a throttle position sensor (TPS) (650 USD)
      - box has basic shift point controls
      - laptop programmable for more refined shift points, etc.
    - Holley makes a TPS for the 4160 and is a tried and proven method people use (120 USD)

 - aftermarket #2 (computer) http://megasquirt.info/products/pro-controllers/microsquirt/
    - Microsquirt flashed with trans controller firmware (325 USD)
      - can be used with MAP or TPS
      - can also be used with differential speed sensor (i.e. explorer rearend)
      - laptop programmable shift points

 - Freddy Brown (relay pack) http://www.fbperformance.com/Accessories/
    - Auto Reset Overdrive & Lock-up Controller (Relay Pack) (250 USD)
    - works in combination with a full manual valve body shift kit (around 120 USD)

 - home made (relay pack)
    - some people talking about having made their own relay pack to control OD and TCC (torque converter control / lock-pressure lock) (yet to find a schematic)
    EXAMPLE:
    The setup I'm building will have a momentary switch for OD, and another for TCC. The brake pedal or the switch will unlock the TCC. The od button will engage OD and also when OD is turned off with the switch it will also unlock TCC at the same time. A down shift from 3rd to 2nd or 1st will also turn of OD and unlock TCC at the same time.

 - stock (computer)
    - 96 explorer EEC-V PCM - which also means converting over to fuel injection (SEFI)
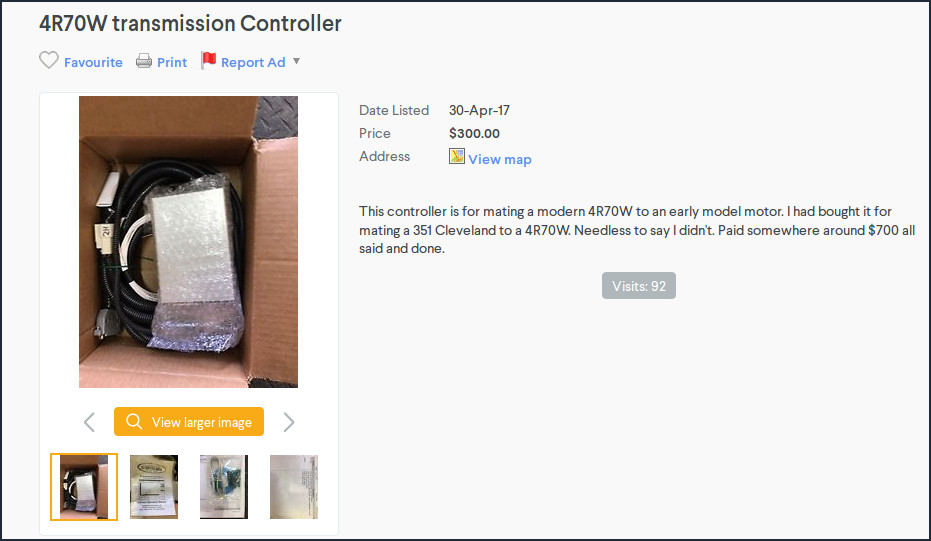
Did a search on Kijiji and found a 4R70W controller and wiring harness still in the box, a Baumannator TCS (Transmission Control System). It was an early version, but for the price a great find.
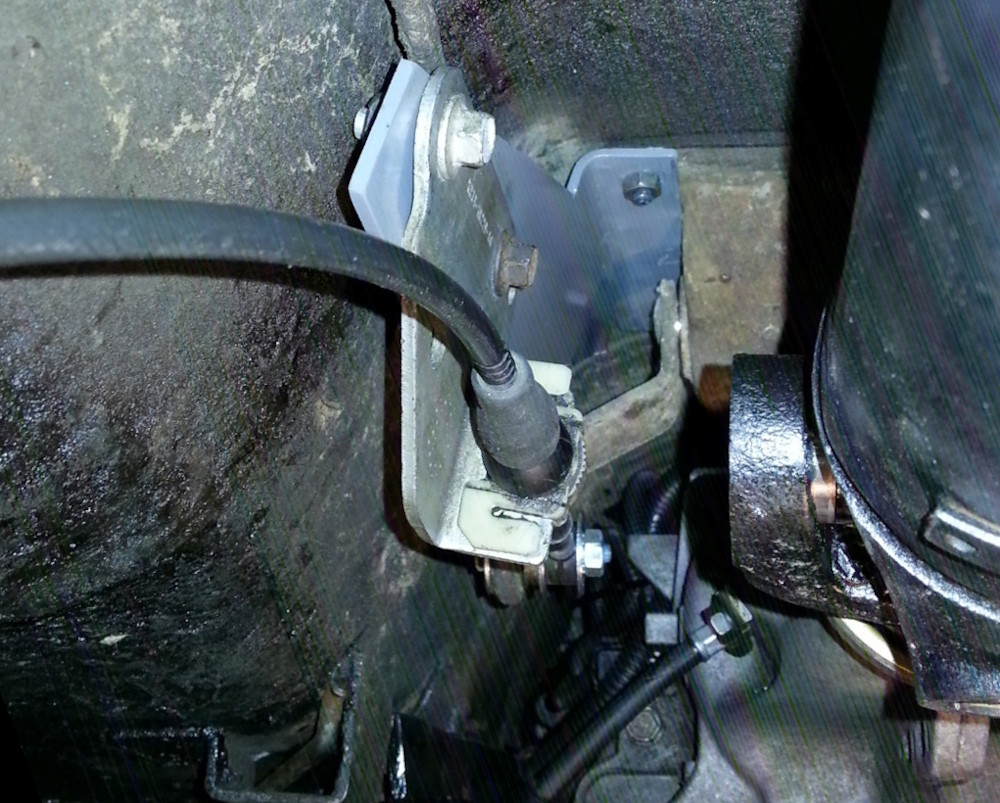
Speed Sensor
A transmission controller needs some inputs. It needs the engine rpm, easily provided by the coil wire, and vehicle speed which is provided by a speed senor. New part # F4AZ-7H103-A
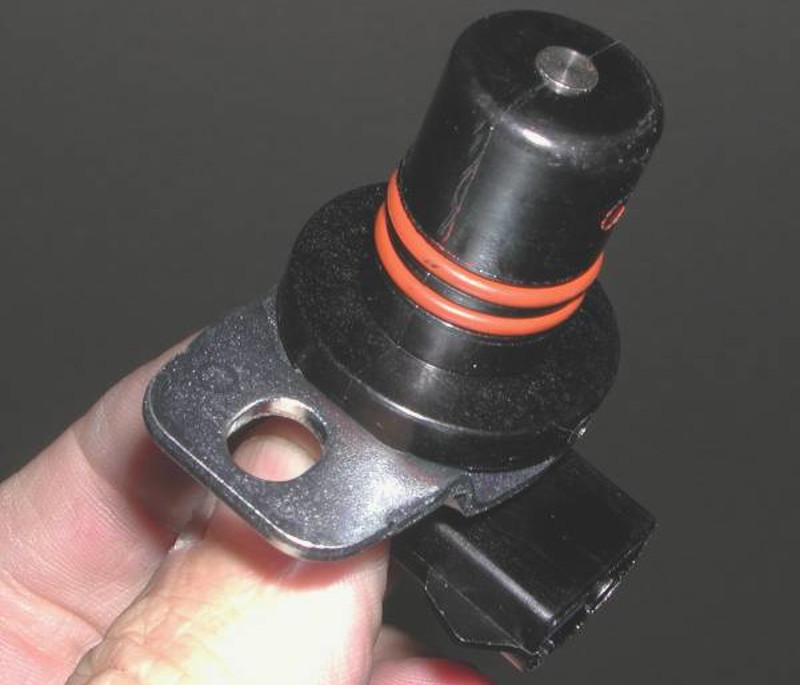
OSS sensor (speed sensor) -- 1997 Ford f-150 xl (4.2 L)
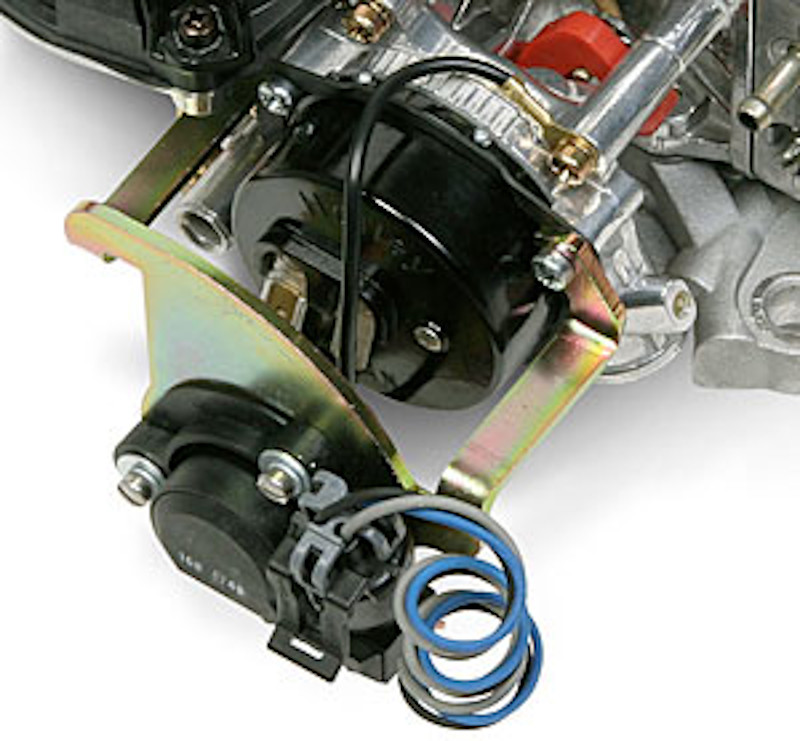
Throttle Position Sensor
The controller also needs the position of the throttle to calculate when it should down-shift, etc. The 4 barrel carb on this 289 was a Holley 4150 and happily Holley makes a TPS kit part# 534-202 which was in stock at the local speed shop.
Installation
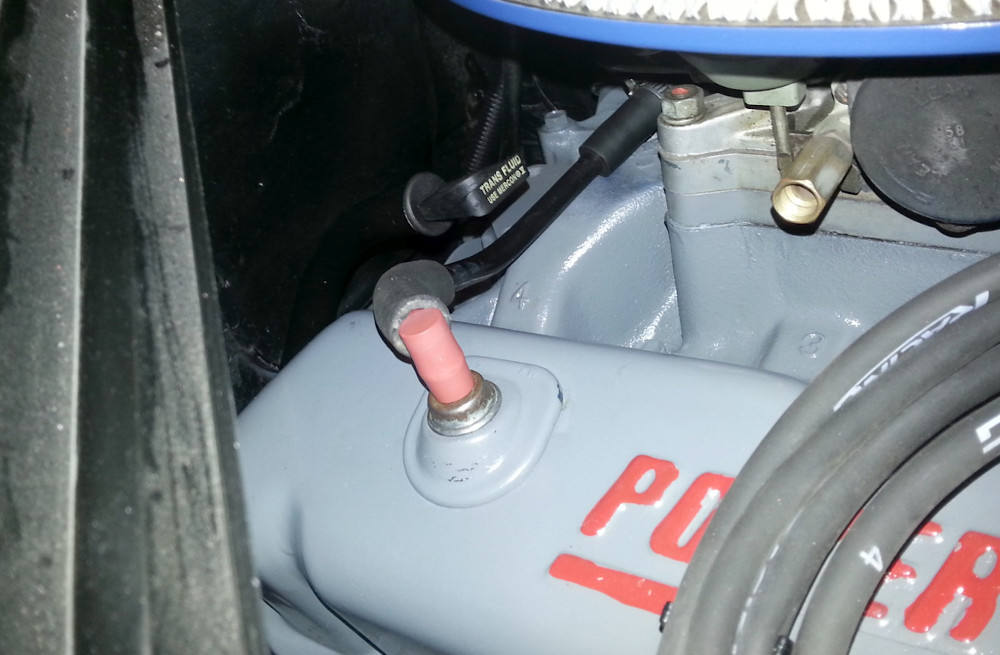
Before installion this 4R70W was cleaned, inspected and received the Do-it-yourself J-Mod which is a modification of some of the hole sizes in the shift plate, etc. to give it a shift kit feel.
The pan of the 4R70W has a protrusion for the oil pickup. It is quite narrow in width and about one inch lower than the rest of the pan. Not too concerning, but something to keep in mind when approaching a tall speed bump.
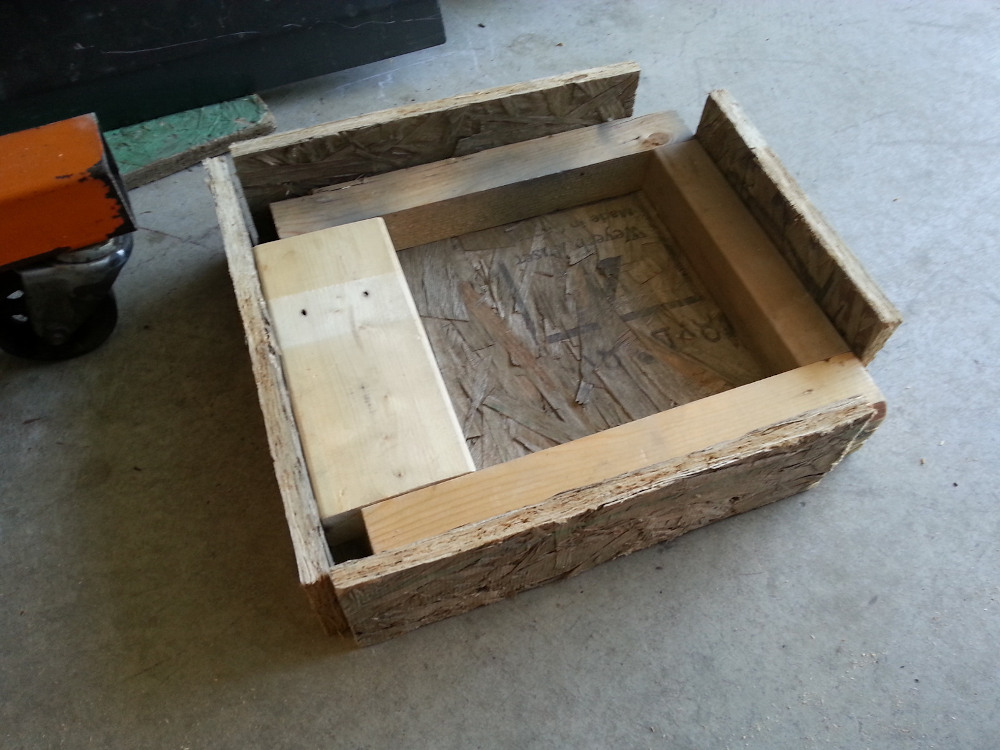
Build a pan support base
Built a temporary support base to protect the tranny pan during installaion.
Remove assembly mount tabs
Lobbed off the front and rear assembly mount tabs in order to clear the tranny tunnel.
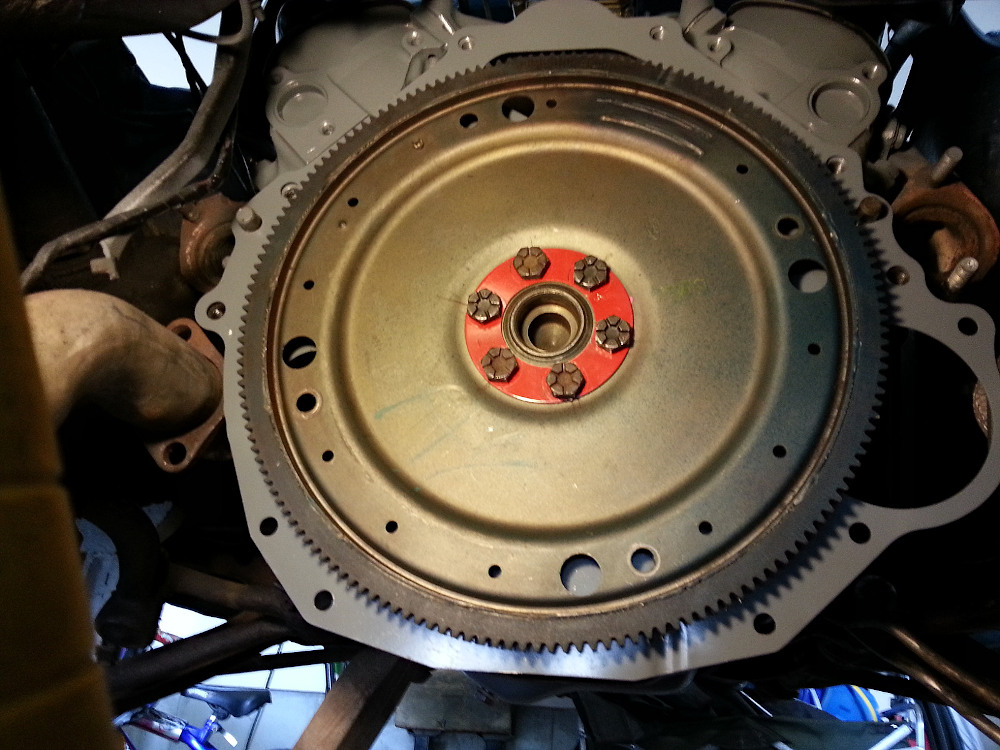
Install Flexplate
The old C4 flexplate had a torque spreader ring. So cleaned it up and re-used it.
Installed the flexplate and block gasket.
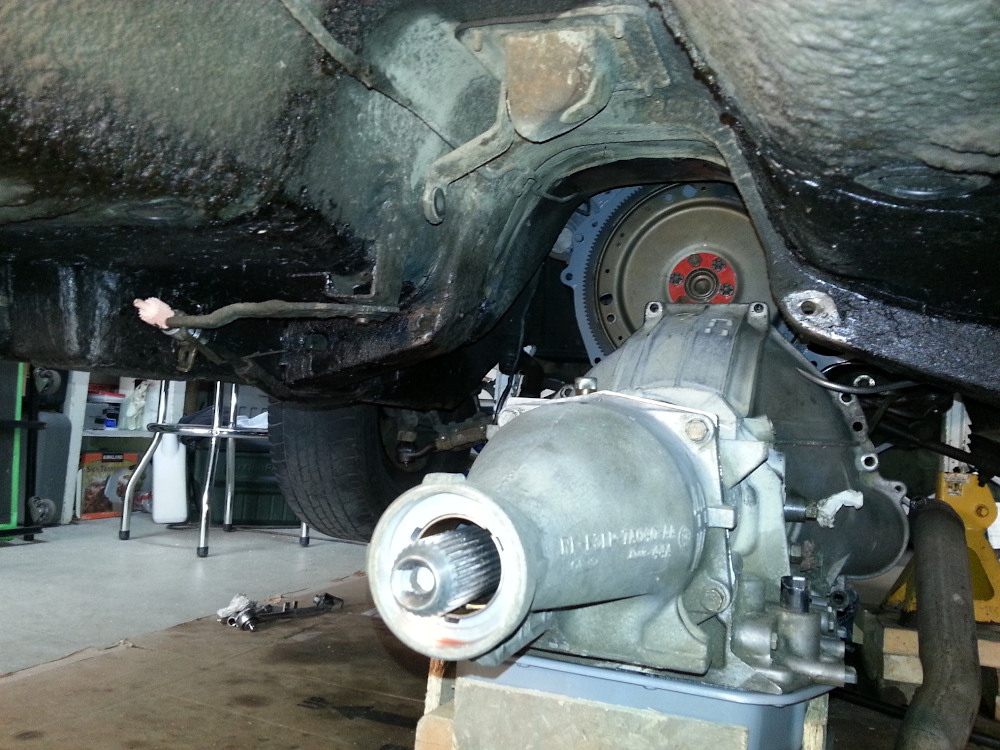
Install The Transmission
Slid the tranny under the car. Turned and pushed and turned and pushed the torque converter towards the tranny until was centain it was all the way in. Bolted the bellhousing up to the engine. There was still some room between the torque converter and the flexplate.
BEWARE (If it is tight you either didn’t get the torque converter seated properly or you have a flexplate with the wrong offset.)
Installed the nuts on the torque converter studs. Lifted it up to it’s proper height.
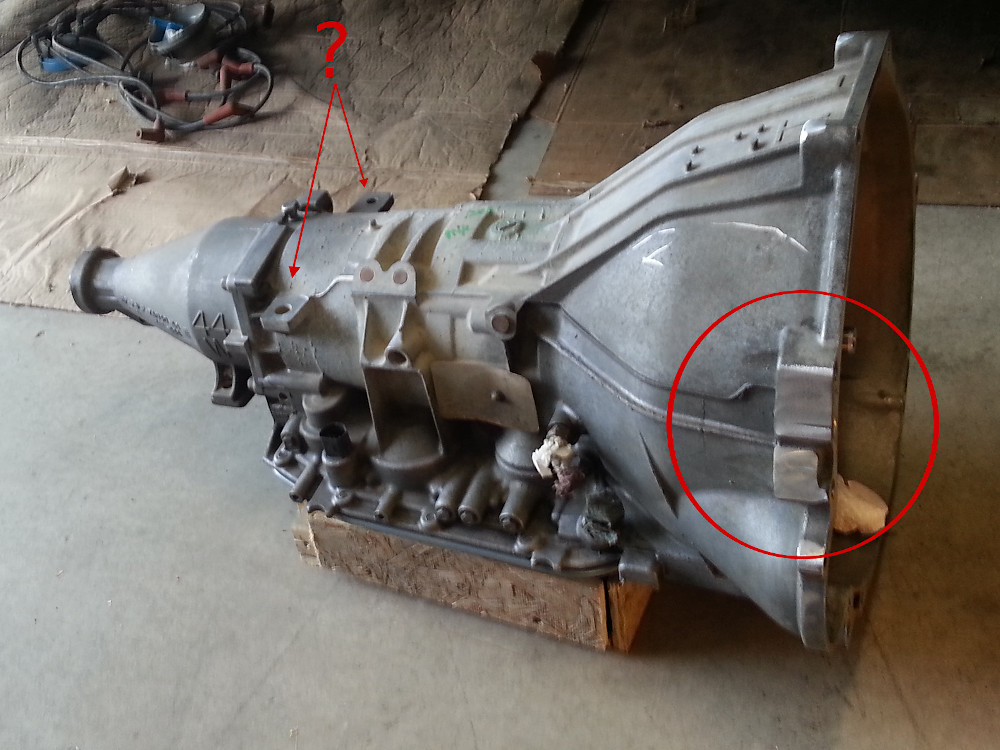
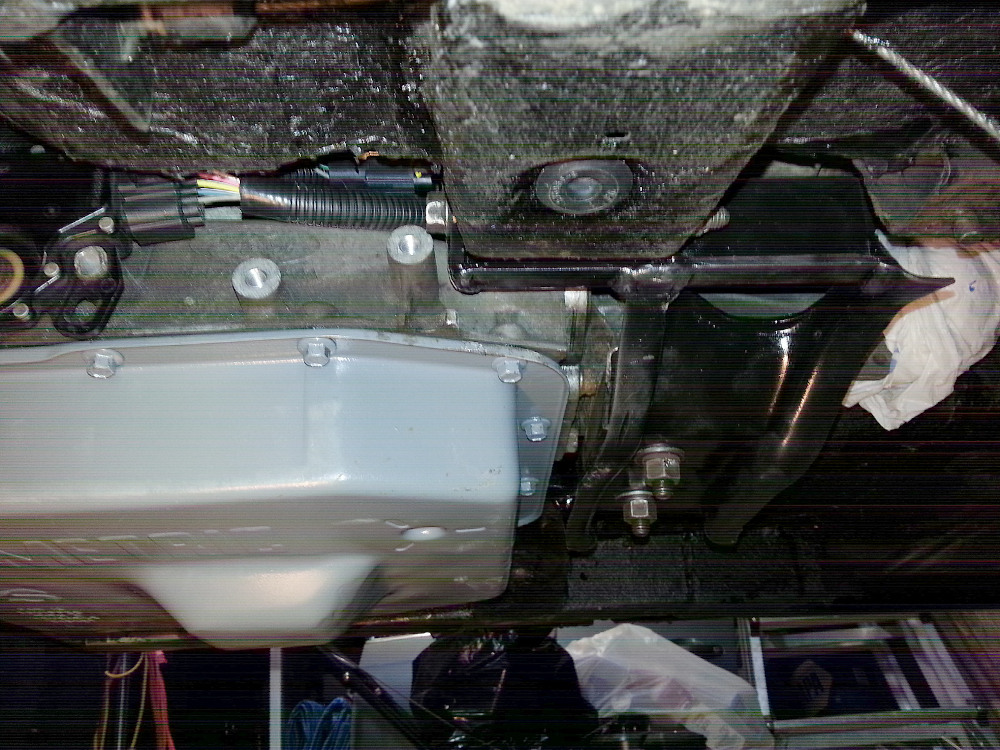
Modify The Rear Mount
Using the original rear transmission brace with the curved side towards the back it was able to be extended approximately 4 inches with 3/16 or 1/4 inch angle material to reach the original bolt holes. Here are some pictures of what was done.
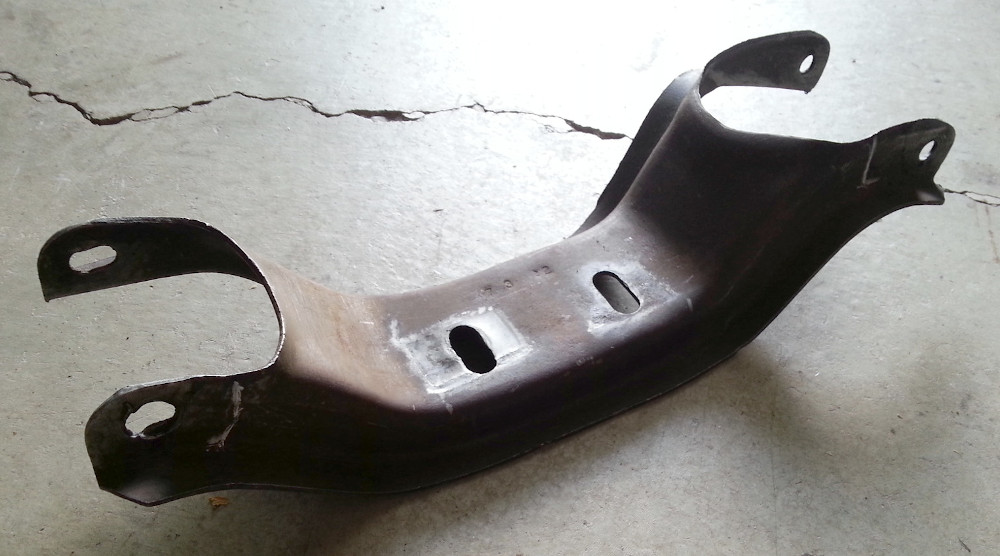 Original holes on one side were worn larger anyways.
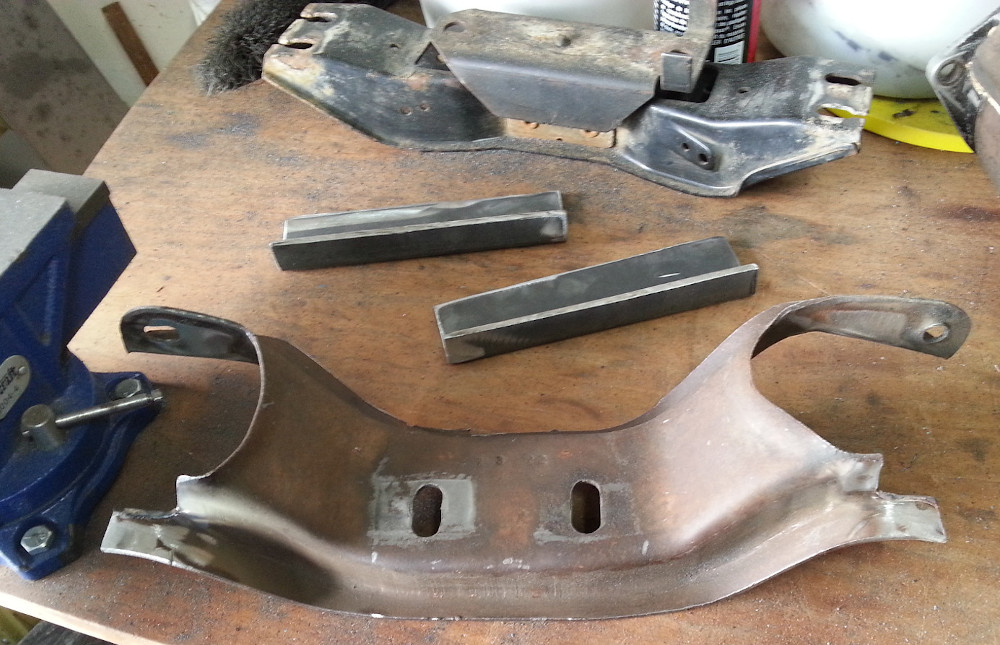 Notched the straighter side for the angle. Angle to be welded to the existing tab of the curved side.
 The finished modified mount with new thicker tabs welded on to the angles.
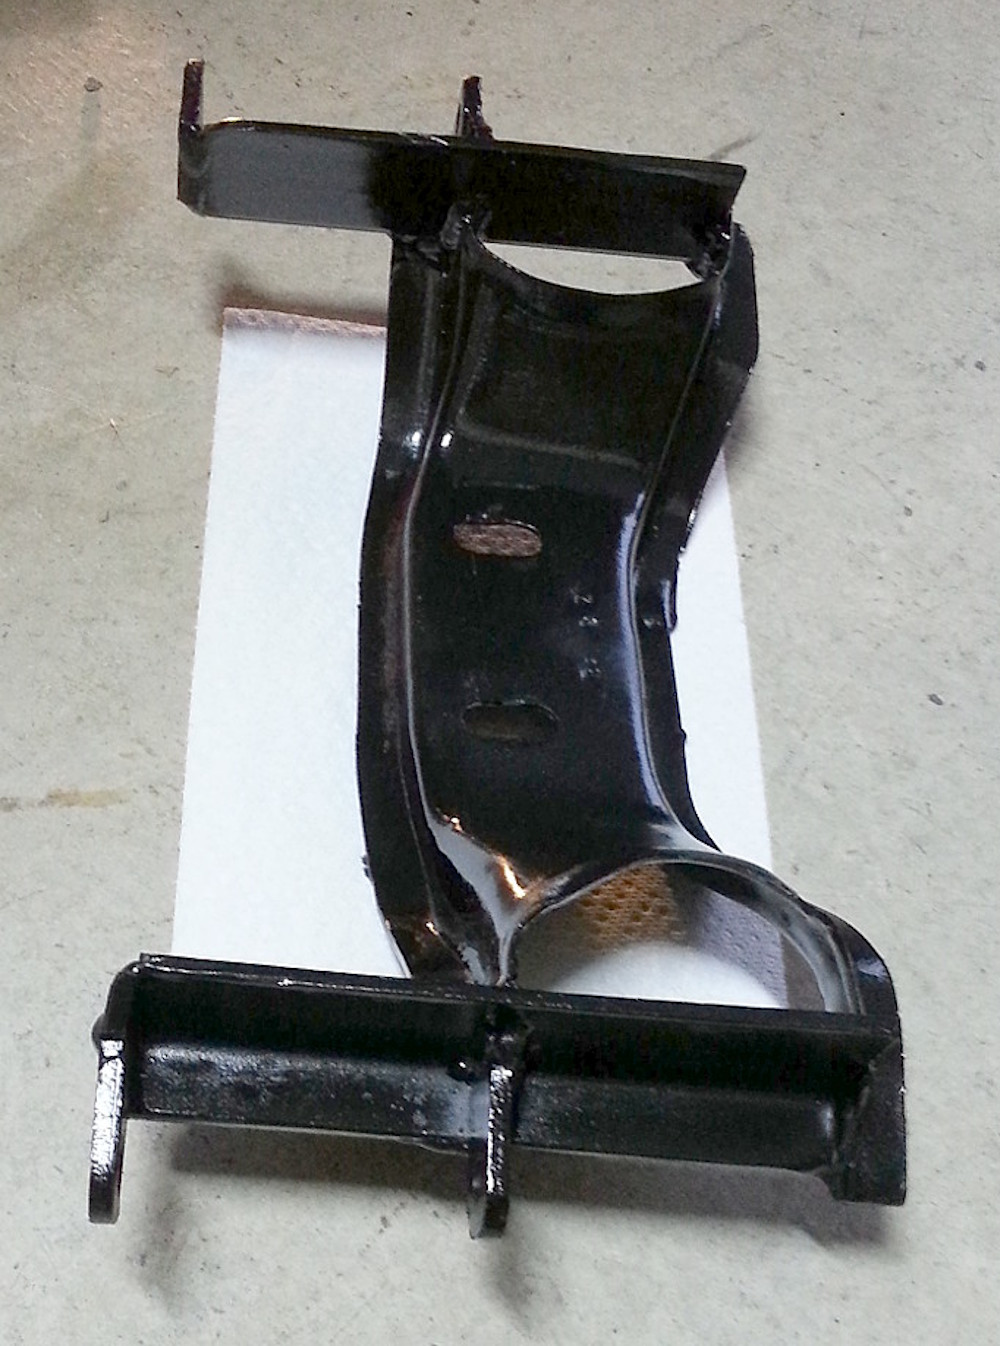
 Drivers side.
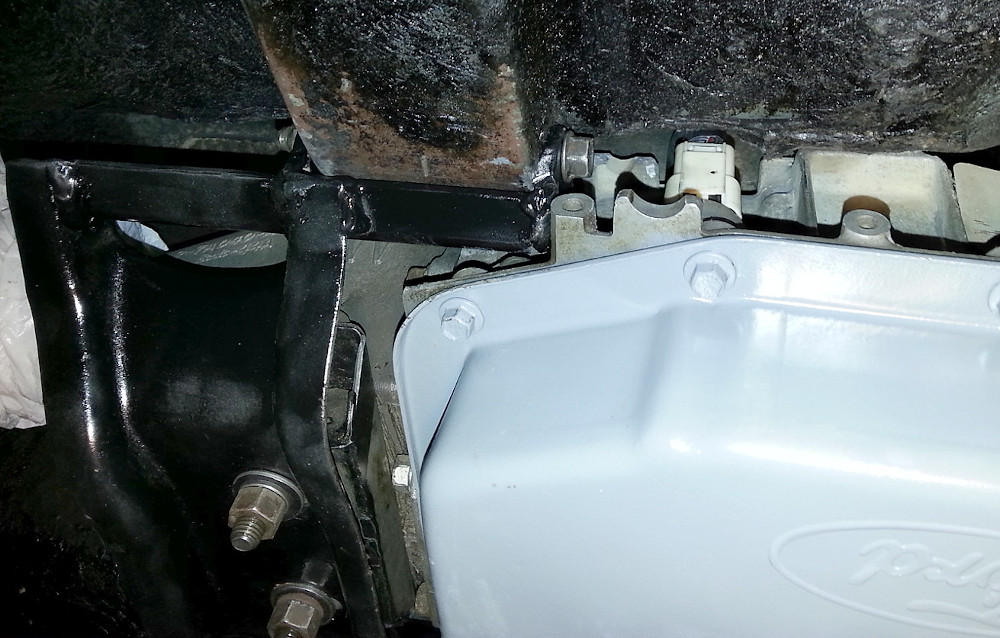 Passengers side.
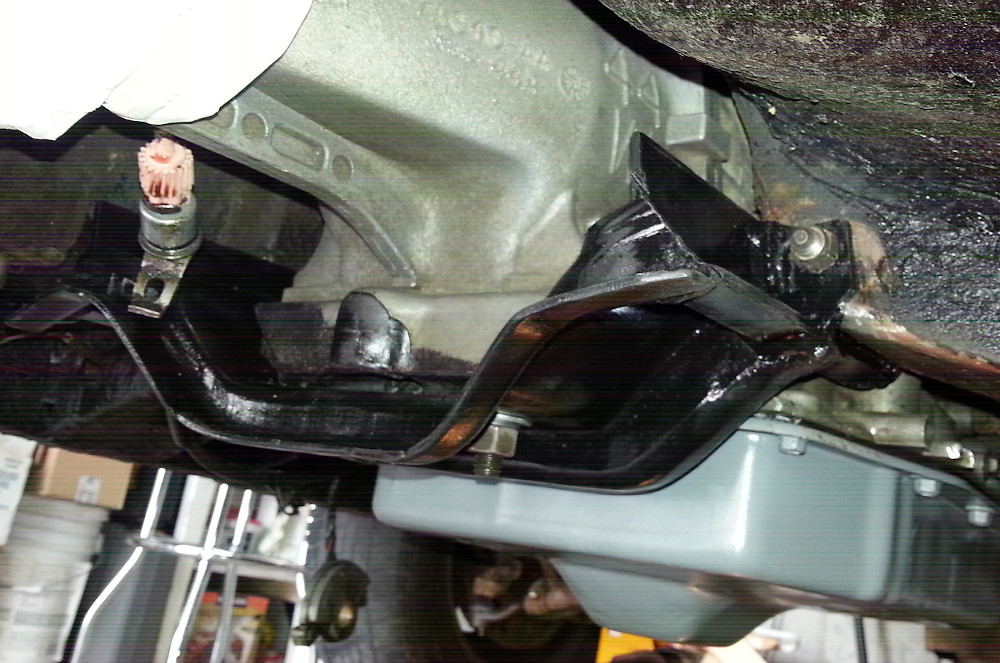 From the rear.
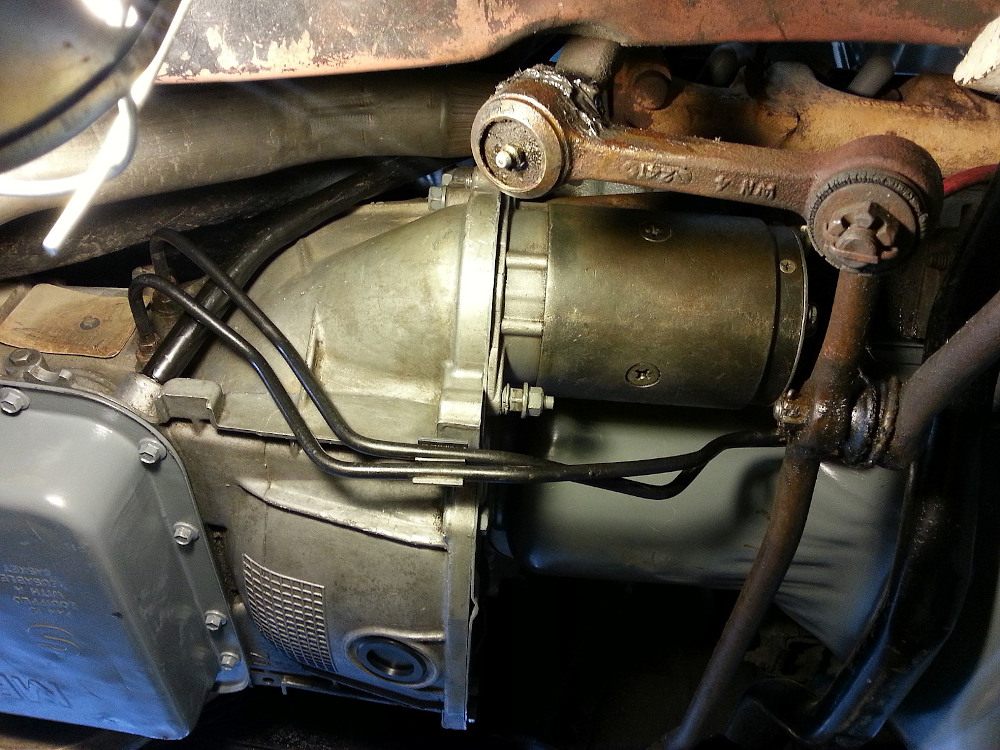
Bend The Dipstick Tube
A little adjustment to the dipstick tube to hug the bellhousing and keep it’s distance from the exhaust.
 A tighter curve on the dipstick tube.
 Dipstick ended up in a good location.
Hook Up The Shifter
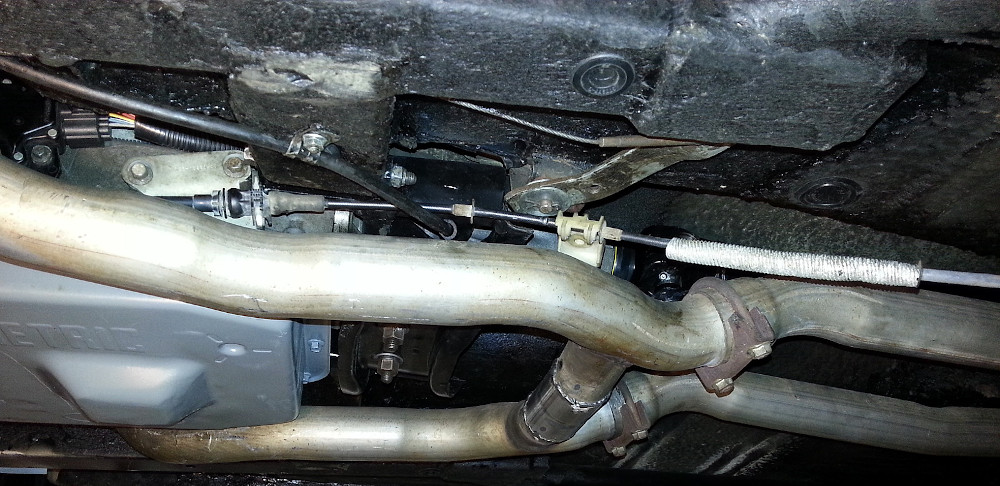
Was able to use the transmission shifter brackets and cable from the 2001 Mustang. The clearances are quite close, but with some tweaking it all fit and worked well.
 Elongated the shifter cable bracket holes to push it up towards the transmission brace bolt.
 Trimmed the bottom of the bracket to clear the exhaust.
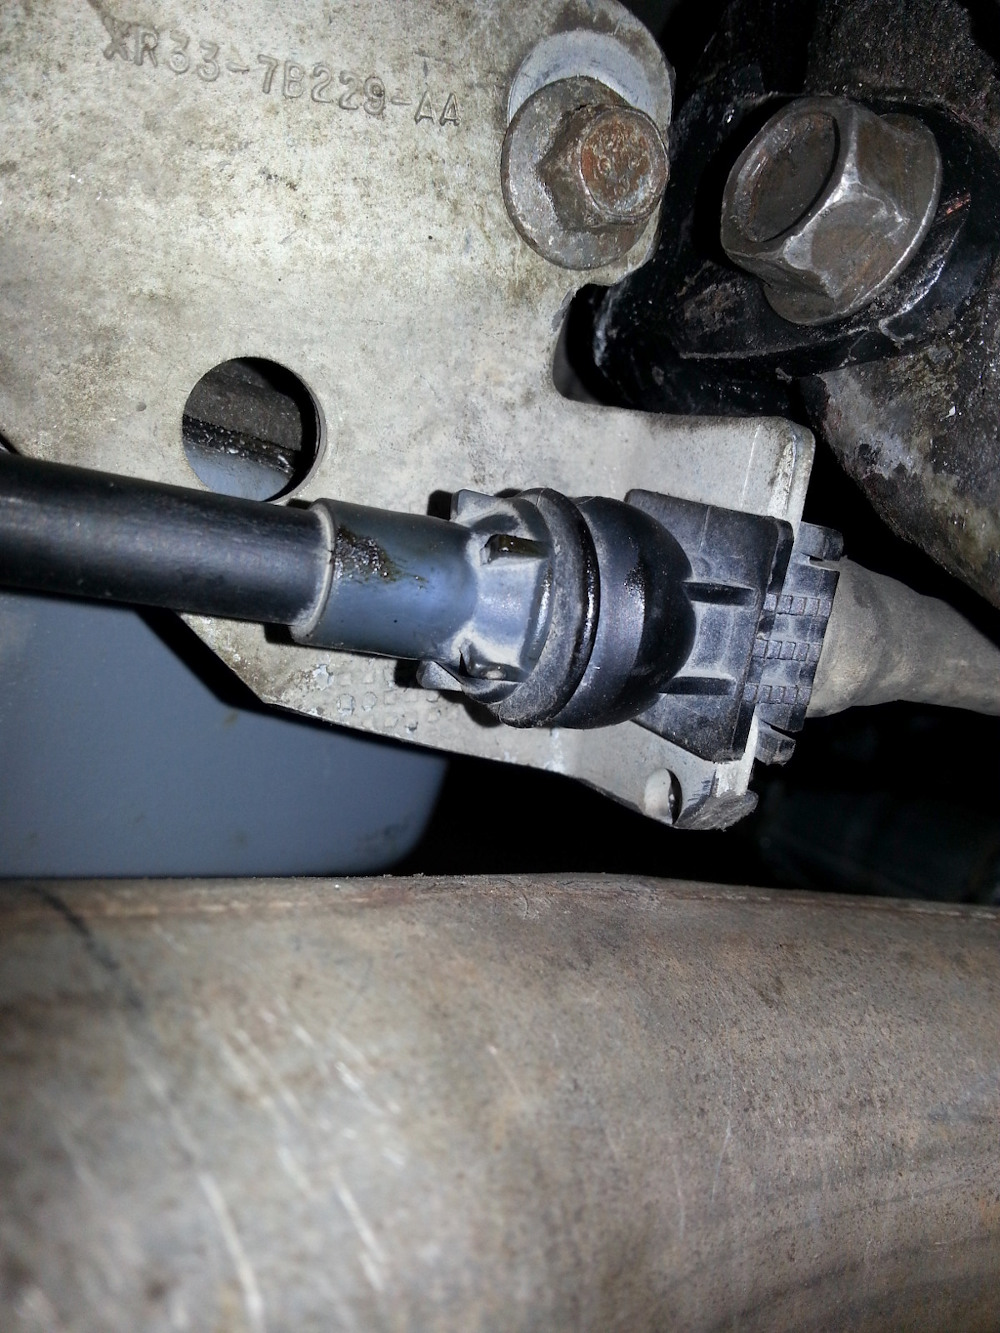
 Shifter switch and cable attached to lever, viewed from the front.
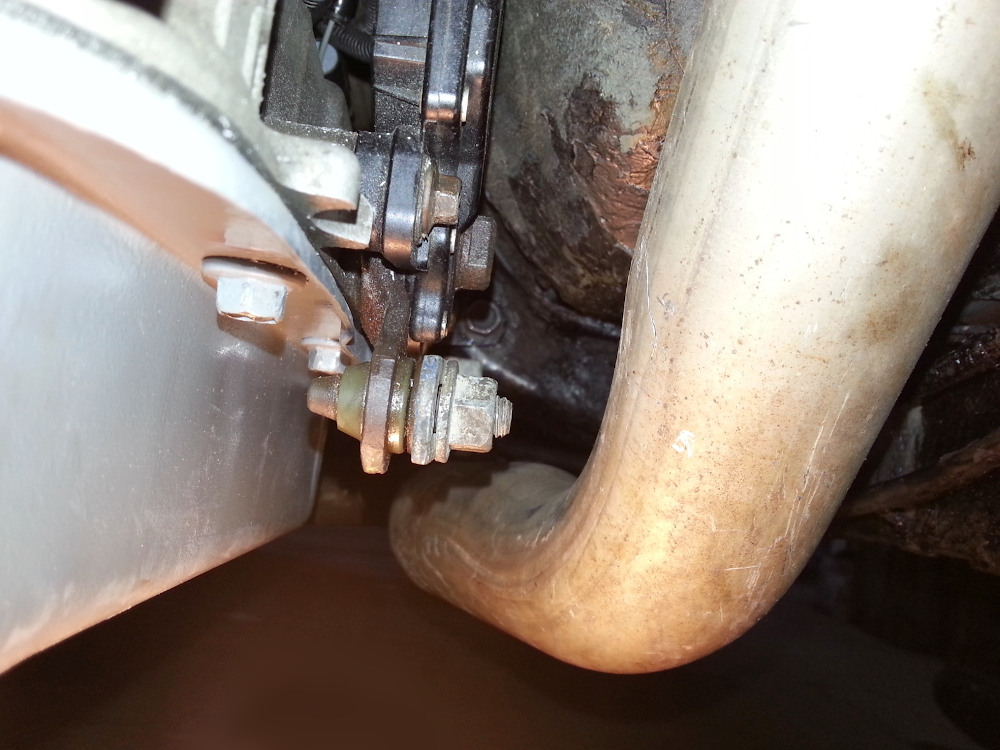
 Shifter cable bracket viewed from the front.
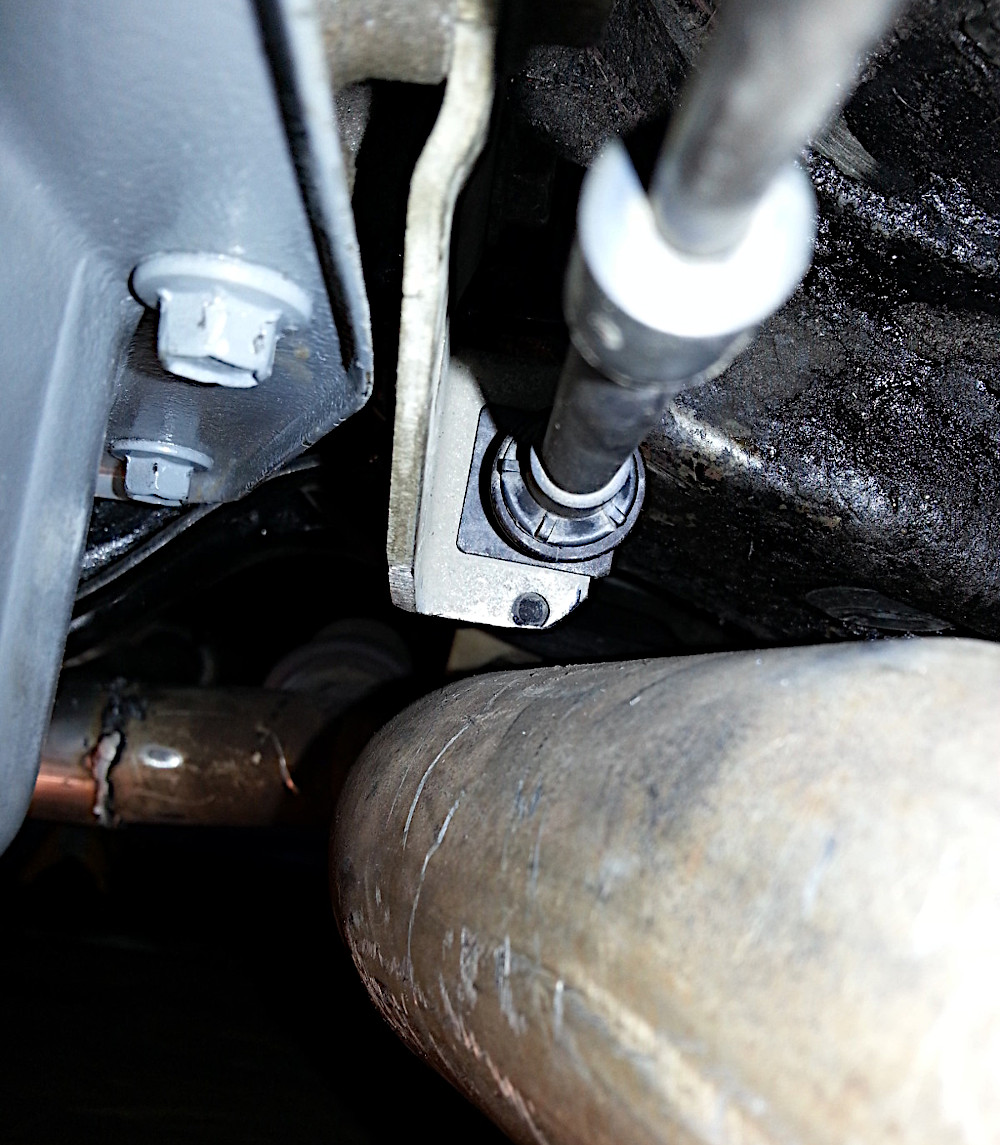
 Side view of bracket and shifter cable. Cable is long but can be looped around towards the shifter.
In order to mount the cable to the actual shifter there needed to be an extra bracket made.
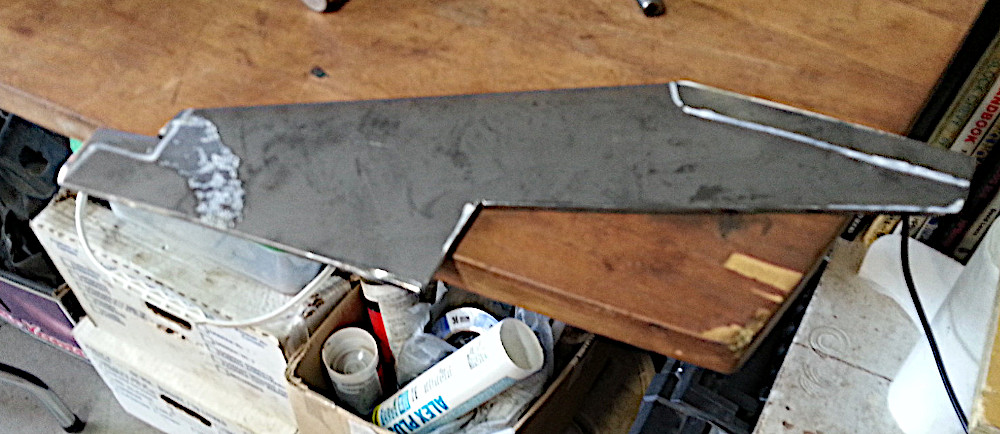 Used some 1/8 inch steel to make a shifter cable tranny tunnel bracket.
 Cut it to size and bent a 90 dgree angle on one edge.
 Cable attached with bushing and extra bracket bolted to shifter floor mount.
 Original 2001 Mustang 4R70W cable’s rear bracket bolted to new bracket.
Wire In The Controller
Whatever controller you go with should come with wiring instructions and be quite straight forward. Basically you mount the computer in the interior somewhere, perhaps in or by the console so that you can easily hook up a laptop to it if necessary and adjust the shift points. Then wire in the tach feed, speed sensor and throttle position sensor.
Have fun!